Monday, 9 December 2013

White Balance And Colour Temperature

Colour temperatures are how the colours in a shot are referred to which can be either a range of cool colours (blue/white) or warm colours (red/yellow). These are measured in kelvin of which colours over 5,000K are cool colours while those from 2,700 - 3,000K are warm colours.


These colours are used to give moods or connote certain things about certain scenes. For example a scene in a cold area will likely have a blue colour temperature and vice versa a hot area will likely have a orange colour temperature.  
Sometimes unrealistic colour is cast in a shot because the camera can't always adjust the picture to balance the colour temperature of a light source and sometimes the colour comes out either more blue or more red. In this situation white balancing can be used to remove this unrealistic cast by rendering objects which you see as white to appear white in your video or photo. 
 

Cameras have a auto white balance (AWB) presets so that the shot colour can be changed to suit the type of hue wanted. AWB tries to apply white in appropriate places. 
Custom white balance can be used to take a colour from the shot which will tell the camera which parts are white. 
Kelvin allows you to set colour temperature based on the kelvin it is measured in from 2,500 to 10,000K depending on camera model.  
Tungsten is an artificial light setting this assumes the colour temperature of around 3,200K and so usually create a yellowish hue. 
Fluorescent is another artificially light setting around 4,000K which has multiple uses since there are different types of fluorescent light with different colour temperature. 
Daylight setting is used during bright sunlight and will balance the colour temperature at around 5,200K.  
Flash is a very white light which balances the colour temperature around 6,000K. 
Cloudy sets the colour temperature at around 6,000K and is best used on cloudy days to create an even balance of lighting. 
Shade is more useful for areas of light shade rather than heavy shadow and balances the colour temperature at around 7,000K. 
Just as white balance can be used to correct the colour it can also be used to trick the camera into showing the scene as more cold or warm than the scene actually is. This can be done with gels which clip onto the light source to project a colour hue onto the scene. If the gel is red than by using a custom white balance can be used to adjust to the camera to white with the hue on top so that when the gel is removed a colder colour balance is shown on the camera as the end result. 


Tuesday, 3 December 2013

Individual Production Journal - Music Video

http://www.youtube.com/watch?v=uLihWbWDIV4

14th of October
Izzy knew she wanted to have a forest/field and a couple meeting in the music video so me and her started brainstorming ideas on what the memories and other scenes in the music video would be. We decided that the couple should meet in a cafe and that we would need a field in the beginning scene.  Izzy filled in the information on the pre-production slide. I, Rory and James helped her by suggesting what props would be needed and suggesting locations that we could use for the field and cafe scenes. We agreed that James would be in charge of finding and looking after the props since he already had a picnic basket we could use in the music video. I would be an editor in the post production, Rory would be a actor if we needed him to be and a camera man and because it was her pitch Izzy would be the director. 


15th of October
Our production pack didn't save properly so Izzy again filled in any information that hadn't saved from the day before. We decided that I would draw the storyboard for the music video, Izzy already had pages of a storyboard template so she scanned them and printed more so that I would have enough to draw the storyboard of the music video. Me and Izzy went out to find a field we could film in and decided on which field we would use at the beginning and that Izzy would be the female character while her boyfriend would be the male character. We also discussed which days would be best for filming and decided on wednesdays to fridays if the weather wasn't bad would be good since everyone would be able to get in by normal college transport.   

21st of October  
I began drawing the story board for the music video including deciding what camera shots and angles and locations should be used during each shot. Izzy helped me decide what would happen in each shot since she knew how she wanted her music video to look like. We traded ideas on how and what should happen in each shot before putting it in the story board. While we were doing this Rory and James searched the internet for cafes we could use for scenes in the music video. They made a list of close cafes and there phone numbers. After they found enough they both rung up the cafes to ask permission to film in the cafes and make plans on what days the filming would take place. they were able to secure a convenient cafe to film in with the owners permission. James also looked for red albums that could be used in the video.  

22nd of October
Continued drawing the storyboard and finished it with the help of Izzy. We also decided that I should draw the script that would explain what the actors should do during the scenes. Izzy showed all of the post production stuff to Gary and booked out the camera with the plan to film during the half term. We then began filling in how long each shot should last in time with the music, Izzy filled in the sheet while I helped her decide what time each shot should last.

27th of October 
Using the storyboard I had drawn as a template I wrote the script making sure to add in what expressions and movement the actors should be doing in each shot and what the camera should be doing in each shot. As well as what effects will be added to the shots in post production.

17th November
With footage that Izzy, Rory and James had filmed I began editing. However I encountered many problems as Izzy had chosen not to film some shots and had started filming other parts of the video on a different camera without the knowledge of the rest of the group. This meant that more than half of the footage was unusable since it was incompatible with Final Cut Pro and we didn't have the time to re-shoot. I was able to edit the begin of the video close to how it was originally planned however I was forced to improvise by adding shots into the video that don't match with the plan. I also had to cut the song short since there wasn't enough usable footage for the whole song. 


Monday, 25 November 2013

Camera Angles

Camera angles are used for the purpose of conveying different meanings about what is on screen to the audience.

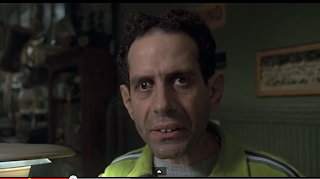
Eye-Level - This is the standard angle and the most common. It shows what how we would see an area or person in real life. For example in Men in Black this shot shows an Eye-Level shot of Jeeb's, the shot is to show where he is looking at but other than that doesn't have any other meaning angle wise.


High Angle - A high angle is when the camera is positioned high and looking down on an area or people. this can be done to show status, the characters positioned high has higher status then those positioned below. It can also be used to portray the hight of different characters, in Rush Hour 3 the camera is positioned at a high angle to show how much taller the man is to Carter.


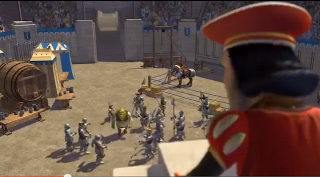
Low Angle - It is used the same as high angle but from those from the lower status view so the camera is positioned down looking up. The soldiers at the bottom are at the lower status looking up at Farquaar who is the higher status. And in rush Hour 3 instead of being from the view of the giant man looking down on Carter it is from Carter's view looking up at the giant man, again this is done to show how tall the man is in this situation.


Bird's Eye - Is a angle that shows a scene from either directly above or high above. It is often used in establishing shots to show a city so the audience know where the events are taking place. It can also be used to show a lot of the scene and the space between characters as well as other objects in the scene that otherwise wouldn't be seen by the audience.


Dutch Tilt - This is where the camera is purposely tilted to one side so that the scene is at an angle. This can be used to portray the mental unstableness of the character in the shot or that something isn't quite right with what is being shown on screen. In the Dark Knight while the Joker hangs up side down the camera turns so that he is right side up but the horizon in the background shows that the camera is at an angle to connote the Joker's insanity.


Monday, 18 November 2013

Idiot's Guide To Post Production Process

First you must create a folder that you will store all of your work, this folder must be in an area that you know you can always find so that you don't loose your work.


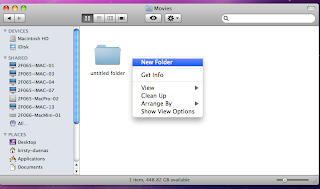
To do this you can simply right clicking on the desktop and clicking "New Folder," this will make an empty folder that is easy to find however this means that anyone logged in can also get into it.


You can find an area in the computer and create a new folder if you feel it would be more secure. Click "Finder" on the bottom left (picture of a blue face) and choose one of the folders you want your work folder to be in, then right click and select "New Folder." Or you can save a folder on a memory stick using the same method of right clicking just in the memory stick.


                                                                             You must then ensure that all the files you want to use for you production are in this new folder you have created. Do this by finding any files you may have downloaded from Youtube or anywhere else and dragging them into the new folder you have created.

If you have filmed footage on a camera, connect the camera to the computer use "Spotlight" at the top right to search Final Cut Pro. You must then create a Scratch Disk so that any files you capture will be stored in this file including rendered files, waveform, cache and autosaves.


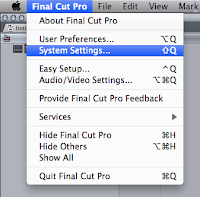
To do this open Final Cut Pro go into the "Final Cut Pro" tab and select "System Preferences," next to the line of ticks click "Set" and use the drag down menu to find the location of the folder that you previously made for all of your work. This is now your Scratch Disk were all the files you put into Final Cut will be stored.


                                                          To get the footage from your camera onto Final Cut Pro go into "File" and then "Log And Transfer" to copy all of you footage from camera in Final Cut Pro. If you have made your Scratch Disk all of your footage will be saved into your folder with all of your work.


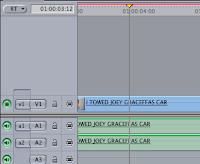
In Final Cut Pro you can create a Sequence this is the order that you put your footage on the timeline to do this drag the footage either from your folder or if you have logged and transferred footage from a camera it should already be in Final Cut Pro and you can then drag it into the timeline. A red line may appear on top of the timeline, this means it needs to be rendered. To do this go to "Sequence" and then "Render All" and then it will take a few seconds for the video to render and it should now play.


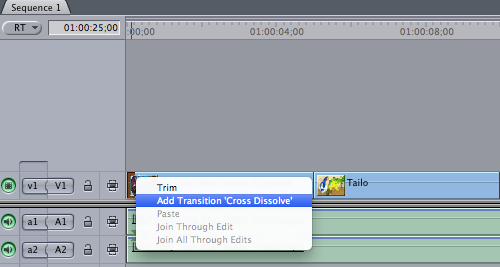
To add crossfades to you clips simply go to the beginning or end of the clip. Right click and select "Add Transition 'Cross Dissolve'.


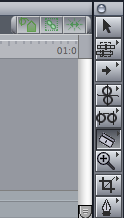
If you want cut a clip move the mouse to the side bar on the far right of the timeline. There will be a razor blade icon. Select this icon and the mouse will change to have a cross next to it. It will change into the blade when you scroll over the video track.


 Then simply click on the section you want to cut and it will be split so you can move the two sections apart.


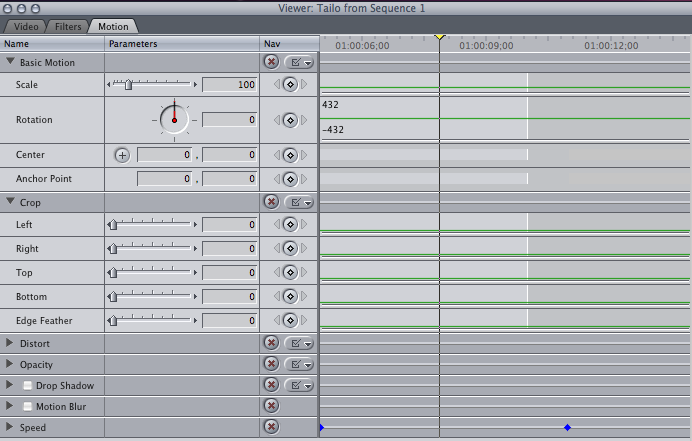
If you want to crop the image shown in the video, go to the first window that shows the video. On top of the screen it will say "Video/Filters/Motion. Click on motion and scroll down until you find "Crop." When you click on crop, multiple buttons will appear that you can click and drag.


By dragging them parts of the image on screen will be cropped. you must make sure you double click on the part of the video on the timeline that you want to crop.


                  You can also have multiple Sequences on one project, doing this allows you to create a rush which is were your sequences can be reviewed quickly because they are in the same project meaning you can receive feedback for all of them quickly. To do this right click in the big box that has "Sequence One" in it and click "New Sequence" this will create "Sequence Two."


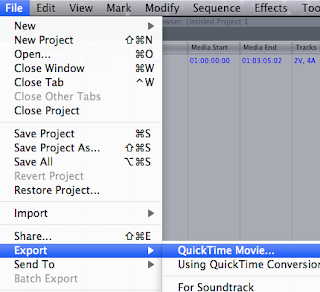
Videos can be exported in different files, this is because different files have different purposes. For example for the video to be the highest quality you may want it to be an MOV format and uncompressed.  in Final Cut Pro you can use Quick Time Movie  a high quality compressed version of your current sequence in a MOV file which is an Apple format. Or you can use Quick Time Conversion which means that the video can be converted to a wider choice of formats. To do this go to "File" then "Export" and select "Quick Time Movie." Name your sequence and save it to your folder, wait for it to finish exporting.


Or select "Quick Time Conversion" and click the drop down option that is on "Quick Time" by default. Choose the option best sooted to your need from the drop down list. This may be because the video you want needs to be in a format for mobiles specifically, or the internet or DVD's. 


Tuesday, 12 November 2013

Avatar - Foley Sound

https://vimeo.com/81506278

0.02 secs need the sound of the clip need the sound of the rope swinging the through the air. I will record the sound of a wooden pole being swung hard through the air to make this sound.

0.00 - 0.32 secs. The reptile also needs to making growling noises I will use human voice to try and make the sound of the creature.

0.00 - 0.34 background noise is needed, the sound of wind/ birds needs to recorded. I may also more noises similar to the reptiles to but in the background.

0.05 - 0.17 secs. The reptile flaps it's wings during this time, I can use the sound of fabric waving in the air like a leather coat to make this noise.

At 0.14 secs the Na'vis start cheering, I will be using human voices to create this sound and since they are holding arrows I will be banging pieces of wood together for when they wave their arms.

The man tries to ride the reptile from 0.03 sec to 0.34 secs so I will be using human voices to make grunting sounds to match with him struggling against the reptile as well as when he nearly falls of the cliff.

At 0.34 secs the man gets flung to the edge of the cliff, I will need to make noise for him bouncing along the ground and grabbing the vine on the cliff. I will do this by hitting a material bag and crushing some rocks against each other.

Throughout the clip jungle sounds are in background.

Since I worked alone I recorded all of the sounds in the video. The reptile noises seemed to match with the action and the patting on the ground also seemed well timed. The added background noise also helps all of the sounds link together and not sound out of place or sudden. Although the flaps of the wings fit with the video it is also very quiet and if done again should be louder. The sound of the clinking of the bows is missing but it doesn't seem to impact the video to much. However the sound of the man's voice trying to ride the reptile is also missing which is a bit more noticeable. The sounds where fitting for the films target audience as it was intended to sound as realistic as possible and no effects where added. Panning was used to make the sounds of the wings hitting the ground sound like it was coming from the appropriate sides, this was also done with the shouting.

Monday, 11 November 2013

Cables

Multiple cables are made with different purposes and qualities. Some are for audio and others for visual.
Such as the composite (analogue) video cable, this cable is yellow and allows visual with analogue transmission but no audio. It carries standard definition typically at 480i and 576i resolution. It is used for standard formats such as NTSC/PAL and SECAM. It only carries one channel and doesn't have as high quality as other cables. 

   
Separate video, more commonly known as S-Video (analogue) cable has a higher definition then the component cable and can carry two channels by separating black and white colour signals meaning it makes a better image but at lower resolution than the composite video cable. It also carries the standard definition of 480i and 576i. Each signal pin is paired with it's own ground pin which is why there is four. The fifth is used to hold the cable in. 

The component video (analogue) uses red, green and blue coloured cables to distribute the signal three ways. It allows resolution up to full HD but because of digital TV's, conversion is needed to create artefacts with edge clarity.
   
VGA (analogue) is usually used for connecting computer monitors, the fifteen pins can connect to video cards, laptops and can be bring the screen of the computer on to HD TV's as well as other equipment. It uses the same red, green and blue method like the component cable and allows high resolution from 640x400 up to 2048x1536 but needs coaxial wiring and insulation for higher quality and doesn't carry audio meaning another audio cable is needed if videos are to be watched on the HD TV screen from the computer.  


Digital Virtual Interface or DVI cable is a digital cable which means it uses a binary code of ones and zeros to transfer the data meaning there is no loss in the quality. It is used on HD TV's and video cards. The interface is designed to transmit uncompressed digital video and can be configured to support multiple modes such as
DVI-D, DVI-A, DVI-I. The cable comes in single and dual link and uses resolution up to 3840x2400 but doesn't have audio.  


A single cable that can carry both audio and visual is the HDMI cable which uses digital meaning it like the DVI uses binary to cary the data meaning no signal is lost. It is used for computers, cameras, monitors, blu-ray and gaming consoles like the playstation 3. There are different versions that allow different quality like version 1.0 for  1920x1080p and version 1.4 for 3840x160p at 30 frames per second (fps) and also supports 3D. There is also a version 2.0 which supports 3840x2160p at 60 fps.  


The RCA cables (analogue) are used to carry video and audio signals through different wires. It is primarily used for stereo equipment and is still used for other devices from before and after the digital switch over like VHS, DVD players and TVs. However the longer the wire the more of the quality is lost and a lot of it can even pick up radio waves meaning other noise and hum can show up in the audio. 

Phone connector (analogue) uses 1/4 jack and 1/8 jack (3.5 mm) which can be found in phones, DSLR's while the 1/4 jack is typically used for audio recording equipment, stereo equipment and guitar and bass leads. The tip is the positive part while the rings are negative and the sleeve stands as the earth. 


XLR conector (digital) is the most common cable used for microphones, the three to seven pins work in a similar way to the phone connector jack's. There is a female connector (left) and male connector (right). Te female is used for source while male is used for input. The are clips on the connector so that they are held in and don't disconnect if something pulls on them.


Thursday, 24 October 2013

Three Movie Clips Analysing Sound


Fifth Element - Diva opera Scene
http://www.youtube.com/watch?v=IoW_ZOfsrzA
The Diva's singing starts of a diegetic sound but it still continuous even when the scene switches to other places of the ship, here it becomes non-diegetic as none of the characters outside the opera can hear the music even when the audience can. Apart from the music all of the sound effects are diegetic such as the gun shots, punching sounds etc. Panning isn't used for the music or singing, even when the camera focuses on members of the audience in different areas relevant to the Diva the music and singing doesn't change depending on where it's heard and remains central, this is done because the music is meant to be focused on by the audience of the film and not the audience of the opera. By doing this it means when the music picks up it feels like it has been built up to go with the action that also picks up. Mixing is used a few times during the opera, when other events are taking place throughout the ship, the music becomes slightly quieter so that we can focus on the dialog of the other characters. Also when the Mangalore (the aliens) knocks on the door his line "champaign for the Diva" has been made louder so that it sounds on level with the man closest to the camera instead of sounding quieter like you would expect since he says it through a door. Again this insures that the audience can focus on the events occurring and highlights the importance of what is currently happening. Also as the Mangalore's break into the Diva's hotel room their grunts become quieter as the camera focuses on Leeloo whose breath becomes louder. When the action starts mixing is used to make the punching sound very exaggerated. Foley sound has been used to make the punching sounds specifically because the sound wouldn't be loud enough or sound how they wanted it to without foley. When Leeloo kicks the blade in the Mangalore's hand the sound of the blade is also foley, used to make the blade seem more threatening and also it being more surprising when Leeloo is able to break it. The growls of the Mangalore's is also foley and is used to fill in what would've been white noise if the scene of them rummaging in the hotel had been left without it.

Final Fantasy VII Advent Children - Fight in Forgotten City
http://www.youtube.com/watch?v=Tc9G-vjik8A
Panning is used on the motor bikes sound, as it starts of further away from the camera or other characters it is quieter but as it gets closer it gets louder. It is also used on the sound of the gunshots and the sound of the ground moving in the same way. Panning is also used for the movement of the red cloak, as it jumps right to left and briefly closer to the screen before flying far away the sound of the material movement also follows this pattern being heard right to left and then louder when closer to the screen and then quieter as it flies away. This is done so that audience can gage how close or far away the action is and helps build up the tension as seen when the motorbike is getting closer to the children the tension grows, we know the motorbike is close not because we can see but because we can hear it getting louder. When Cloud enters the flower field mixing is used to make Aerith's voice seem slightly louder, it is also more echoey while Cloud's voice remains at a neutral level, this makes her sound more ethereal and shows the audience that she is different in some way to Cloud. Mixing is also used to make the children's footsteps sound loud when they jump on the path, everything goes quiet when they appear apart from their steps. The clicking heard at the beginning of the clip that also appears again in the clip is a non-diegetic sound used to represent the virus in the characters however it cannot be heard by any of them. The music that plays during the Flower Field scene and during the battle scene is also non-diegetic used to enhance the atmosphere. However the sounds of the sword's shing, gunshots, motorbike etc. are all part of the diegesis, used to enhance the experience of watching a very quick pace fantasy battle. Since it is an animation all the sounds used are foley sound however they have all been created to sound as close the real thing as possible and haven't been exaggerated like the punching sounds in The Fifth Element.

Men In Black - Headquarters
http://www.youtube.com/watch?v=q3OTEdZkBaQ
A lot of sounds occur at the same time during the beginning if the scene, panning is used so that the sounds heard nearest to camera are louder and then become quiet as the camera zooms back. The announcement can be heard as background noise and so panning is used to make it sound far in comparison to the noises taking place close to the camera. A sound bridge is used when a man is talking to an alien that has apparently just arrived on Earth, mixing is used to make their voices sound louder than everything else happening around them, this allows the audience to gain insight into how this organisation functions as well as foreshadowing later events. Mixing is also used while K and James speak to each other as while they walk through the offices while a lot of other things are happening their voices are still heard over all of it. When they enter the room full of confiscated technology panning is use on the sound of the floating ball which sounds more to the left to match where it is placed, mixing is also used on it since it sounds louder then all the other technology in the room. This is done to draw attention to it both for the audience and James. When the ball goes flying mixing is used on it again to make the sounds of it hitting things and the sound of it moving louder than everything else. Panning is also use on the sound of the ball hitting the walls as it bounces from place to place the sound is also heard based on further right or left. All of the sounds used in the scene are part of the diegesis used to make the environment seem more real and reminiscent of the noise heard in an airport with the announcers and workers. Foley sound is also used a lot since some of the aliens are animation or some sounds wouldn't be heard properly with the rate that the camera zooms out, because of this all of the aliens voices except for the one talking to the man are foley and all the sounds of the technology are also foley. This is done because the sounds being made for the aliens and technology are created to sound otherworldly.


Monday, 21 October 2013

Princess Mononoke Foley Sound Evaluation

Princess Mononoke Foley Sound Video:
http://www.youtube.com/watch?v=IfdLkAhNKic

The first thing we recorded was the deer and horses hooves steps as we could see they were continuously running throughout the clip. The recording of the coconut seemed to fit very well and in sync with the visuals. We made sure that the deer's hooves could only be heard when the camera was close to it and added a fade so that when the deer ran away off screen the sound followed it. We also made the horses hooves quieter than the deers during the shot were the horses can be seen from a distance, this worked since it match with the visuals which showed the horses further away from the camera. When the camera got close to the horses though we made the horses hooves loud since their where two of them and they are heavy animals.

We also made sure that the sound could be heard in sync with the arrows hitting the ground at the very beginning, the sound of a wooden pole didn't sound perfect but it fit well enough. 
We added the sound of a bag being hit by a wooden pole as the sound effect of one of the soldiers attacking the villager and a man shouting this was in perfect timing with the soundtrack which picks up just as the action begins and the virus attacks the main characters arm.
the sound of the virus was perfect, it sounded slimy and other worldly however because it was the made from lettuce swishing around in ketchup, even when turned up to the maximum it was slightly drowned out by the music.

We used the sound of raw meat smacking wood as the sound of the arms being pinned to the tree and although it sounded perfect it didn't quite match the timing of the visuals.  The wind sound effect however, made by simply blowing into the microphone, worked well with the arrows flying through the air and the thump at the end, made by dropping a heavy bag on the floor, was also in time with the body falling of the horse.


All around we did quite well and worked very well together as a team helping each other to make the sounds, as all sound effects apart from the soundtrack were made by us. We however missed a few sounds such as the sounds of the other soldiers and the sound of the panicked villager, the deer and horses are also completely silent apart from their hooves. We also forgot to add in the sound of the bucket being kicked as the deer ran past and also forgot to add any more sounds of the men. There was also some inconsistency as we forgot to add the same twang noise of the arrow from the beginning in the later scenes. The sound of the head being knocked of also doesn't seem to fit with the visual.

The sounds used match with the targeted audience as the anime itself is targeted for older children and teens and so the sounds used are not meant to be cartoony but more realistic. The sounds are very well synced with the action in the scene and some sounds needed to be slowed down so that they sounded right like the sound used to create the virus under the characters arm.
  

Editing Task

If footage has already been recorded then log and transfer should be used so that the footage can be put directly from the camera into Final Cut Pro. If there is already footage saved onto the computer then go to File - Import - Files then a box will come up, find the footage on the computer you want and choose it. 


It will now be in Final Cut Pro were you can drag it into the time line to edit.


The easiest way to add a cross fade is after the clip has been dragged into the timeline you can right click on the end that you want the fade to occur and then click Add Transition "Cross Dissolve."


In order to cut the clip you must press the Razor Blade tool on the window on the right hand lower corner. Then click on the parts of the clip that you want to cut.


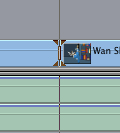
In order to crop a clip move the curser to the end that you want to crop, click and hold on the end and then pull it down to the part that you want, this will delete the parts of the clip you don't want but you can also return them by dragging the end of the clip back.  


When you are finished editing the footage go to File - Export - QuickTime Movie.


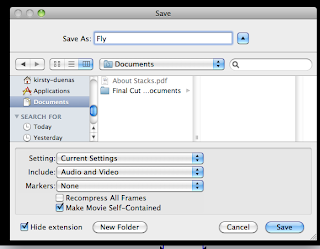
This box will appear, name your project and then press the arrow next to the Save As box. This will open up Documents so you can find a place to save your finished project. You can change settings to change the quality of the video or if you plan on uploading the video elsewhere you can change the settings to make the video compatible with other sites. Then press Save and wait for the video to finish Exporting. 


Monday, 14 October 2013

Instructional Video On Setting Up Camera,Tripod, Sound And Lights Evaluation

Our group was made up of seven people in order to produce this instructional video. http://www.youtube.com/watch?v=pf4gwUHbTlQ

Our team was set up with roles before the beginning of production:
Me, Izzy and Rory as actors.
Derry as camera man.
Eddy as lighting.
Megan as sound.
And Amy as the director.

I was one of three actors that would show up in the video. my role was to show up during the demonstration of how to set up the camera in the video. I also became one of the two editors who worked on the footage in post production. The filming however was rather difficult since no planning was done before the filming. To make things more difficult during the filming multiple members of the group had different ideas on how to film the video meaning that the the filming took longer than necessary and the director didn't make too many of the decisions in the end. A couple of members didn't seem to contribute as much as others.
However the majority of members worked hard once the filming got going and footage captured was at a good standard.

The camera work was very well done and showed all of the smaller, important parts of the equipment such as the camera switches and tripod level dial.
The light setting was also well done and the video was good at showing the difference between no light and with light, however the actual set up of the lights footage was missed.
The sound equipment was shown and the narration was balanced with the clips and could be heard over the background music which made the video flow better. However the actual narration misses full explanation such as talking about the dead cat etc. This was due to the editors and actors rushing to finish in time during post production, also we did not have any direction from the sound member during filming.

All in all the video is at a good standard and shows all of the main components of an interview, it simply misses a few details.


Sunday, 13 October 2013

Music Videos: Who, What, When, Where And Why And Also How

"Let It Go" By Fossil Collective
 http://www.youtube.com/watch?v=J5nE1510oYo
This music video shows many of Andrew Goodwin's characteristics for music videos.
The music video falls into the genre of romantic tragedy. This can be seen through the narrative which follows the man "Edward" who begins working throughout the years of his life to build a ladder to reach the woman "Anne" who is stuck on the moon after he fell out of the hot air balloon on their journey. The music video conforms to genre it is based off. The tragedy element comes from the separation of the couple and the aspect that it takes years before they are re-united. The main character Edward is shown to be very determined and is the male character that "refuses to give up until he is with her" which is found in the typical romance genre. Also part of the romance genre is that of which the male characters perseverance is then rewarded with the "happily ever after" scene at the end when Edward is able to embrace Anne. By using film genre's in the music video it helps elect a emotional response from the audience who will recognise certain conventions, thus making them want to watch the video to what will happen in it's narrative while also making the music itself more memorable.

The music video shows the ideas of romance through a flashback (another technique typically used in film) at the beginning, the couple are seen together in a hot air balloon, the lyrics at this point are "we were an island, you were the one who broke away" this also matches the visuals since it connotes the idea of them being together and then being separated as happens during the scene when Edward falling out of the basket. The visuals and lyrics also match during the clip when Edward is looking out to the moon and stars the lyrics are then "only when the moon is high enough, only when the stars are light enough." In the case of this song it could be interpreted as a cautionary tale for young romance, the lyrics "we started something, tried to make a fire without a flame" referring to teens or young adults trying to be a couple before they are ready. This also matches with the next lyric "why it wasn't right I couldn't say" which connotes that sometimes relationships don't work but no one is always to blame. The "Let it go" chorus is the main moral of the song, that when things don't work out you shouldn't hold on but should instead move on. If this was the interpretation of the lyrics then the visual would be a metaphor for this, Edward and Anne would symbolise the young couple, their separation would symbolise insecurity at not being ready to commit to each other. Their years apart from each other would symbolise the time it takes before they would be ready to be together (which for young people it can feel like a long time before they grow up). However the happy ending symbolises that even if it seems a long time you will eventually you will be ready to have a serious relationship however you shouldn't on until that moment. By creating these links between lyrics and visuals it means a deeper meaning behind the song can be conveyed to the audience through both the narrative and audio. This allows audiences to try and interpret the song and will therefore engage more with the text meaning they are more likely to enjoy it and listen/watch it again

The angles of that the camera and pacing is used to gain an emotional response from the audience. For example the camera is at a high angle showing Edward cling to the base of the balloon which shows the audience the height the characters are, this is followed by the fall which is in slow motion to make it appear like a long drop. The camera zooms out slowly backwards from Anne while the screen turns grey, this is also used to portray Edward's vision of watching her get further away. All of this is done slowly so that the visuals match the pace of the song while also making it seem more dramatic to the audience. The use of this slowness is kept throughout the entire video as it is a core part of the narrative, for example Edward must wait years for the trees to grow back so he can continue building his ladder. This passage of time is shown through the sped up process of night and day paralleled with close ups of the tree shoots growing and a close up of Edward's face so his white hair can be seen. This is used to create the tragedy aspect of the genre and also matches the continued slowness of the song, therefor creating a relationship between the music and the visuals.

The video also follows a visual style that the artists like to use. They have used stop motion in another one of their songs "On And On." Since they are an independant group they use this style to make themselves stand out from other music videos, it is also done because cheap materials such as paper and lego is used to create the videos meaning from selling their songs they can easily make back the money they spend making it.

There are many references made to other media throughout the music video, while the character is falling the camera shows some records falling with him in slow motion. These also appear in other scenes of the video, these are Radio 4's Desert Island Discs. The idea of building a ladder from earth materials to reach the moon is also a reference to the creative capabilities within the video game Minecraft.

The video doesn't make use of any voyeurism however it does make references to the notion of "looking" as Edward is seen unfolding a telescope which the camera zooms in on, the clip then cuts to the point of view through the telescope showing Edward looking at Anne on the moon. A few seconds later Edward is seen climbing a tree and then a panning shot across a long shot is used to show him staring at the moon. This means that this music video uses all characteristics found in Andrew Goodman's theory.


"Diary Of Jane" By Breaking Benjamin
http://www.youtube.com/watch?v=DWaB4PXCwFU
This song like "Let It Go" in that it is also very narrative driven however unlike Fossil Collective the band is a major label, this means the style of the music video is very different. The band itself is part of the rock band genre, meaning it uses a lot of the band playing it it's footage, this is also due to it's major label status as it is used as a motif so the audience can identify the product based on the band members being in the video. The colours used is also part of the style of the band as they tend to play in darkly lit areas with plenty of shadows which is also reflected in their music videos which also have lighting placed to increase shadow.

Another contrast to "Let It Go" is that "Diary Of Jane" utilizes lip sinking which is used as the main link between visuals and lyrics, the majority of lyrics is seen sung by the lead singer while the band is playing on in the music video, this is because Breaking Benjamin uses the band members themselves as the recognisable product for the audience while Fossil Collective instead uses it's stop motion style. Apart from the lip syncing however there are other instances when the narrative of the music video matches the lyrics for example the lyric "as I look the other way" is linked with a medium close up of Jane, the woman, turning her head. Also the diary that the song is about is also shown in the music video both through long shots at the beginning of the video making it hard to see and close ups at the end of the video ensuring that it can be seen. This is done to enhance the narrative similar to how a film would place a plot device for example something of unknown importance is introduced at beginning of story (diary) which is then brought back later and explained so audience can fully understand the importance of the device (it belongs to Jane who is now dead). By using a convention seen more commonly in films it helps audiences understand the weight of the narrative that the music video is trying to portray and can encourage audiences to engage with the music video by trying to figure out it's meaning before the answer is revealed. The song could be interpreted to be about a man (Benjamin) who has lost his love (Jane) and so began reading her diary about her life only to discover that he isn't mentioned at all in it. This can be taken from the lyrics "I will try to find my place in the diary of Jane." After discovering this he starts to destroy pieces of the diary in a desperate attempt to find some mention of himself which links with the lyrics "As a burn another page, as I look the other way." Because he can't find any mention of him he starts to hate Jane for apparently not loving him as much as he thought which can be derived from the lyrics "There's a fine line between love and hate" and "No love, there is no love." Because he is destroying parts of the memories Jane wrote this explains why when Jane is wandering around her house she finds objects missing, can't see herself in the mirror and looks around like she is missing someone else. It could be interpreted that the missing things are the parts of the diary that have been destroyed by Benjamin who ultimately decides to leave the diary behind. It is this kind of interpretation that the audience is encouraged to make when watching the videos because it allows them to become more invested in the song and the video which drops hints about it's narrative throughout as demonstrated.

The music changes pace from it's intro to the verses and chorus, this prompts the visuals to change with it in a much more diverse way than "Let It Go" which was constantly slow and so only had to have the visuals remain slow in "Diary Of Jane" the visuals like the music starts slow before speeding up. The beginning of the song starts with a slow beat which the visuals match with slow panning shots in the forest and into the house where Jane is. As the music picks up Jane jerks awake at the same time a sound bridge like link between the scene with Jane and the band playing. From here almost every beat results in a shot change of a different view of the band or of Jane. This is also done with the lyrics as some words end results in a shot change as demonstrates here:
"So (close up) tell (medium long shot) me (long shot) how (close up) it (medium long shot)
should (medium long shot) be (medium close up)."
This helps create continuity within in the shots, the clip changes don't feel awkward since they are in time with the beat and are almost unnoticeable. The look of narrative also matches the lyrics as it is a sad song that connotes death and desperateness the visuals are full of shadows and dull colours, this is also part of the motif of Breaking Benjamin.

The song uses a main female character in the music video however in the beginning when she is in the bath the camera only focuses on her face and her body remains unseen. Throughout the music video she wanders around wearing a white low cut dress however despite this the camera still remains at a high angle and her face is the focus of the shots that don't go below her neck. Because of this there are no sexual connotations in the music video and voyeurism is avoided. However the video still references the notion of looking, this time instead of using telescopes it uses mirrors. Near the end of the music video Jane spends some time staring into the mirrors even though she can't be seen.

Although "The Diary Of Jane" also follows much of Andrew Goodwin's theory it however doesn't seem to contain any intertextual references making it different from Fossil Collectives "Let It Go."


"Sing For Absolution" By Muse
http://www.youtube.com/watch?v=6Ck6Hcg2cjk
The music video for this song plays very heavily on the sci-fi genre which is used to portray the narrative of the music video, because of this the rock band don't use the same conventions that Breaking Benjamin used despite them both being from the same genre of music. Unlike rock bands like Breaking Benjamin and other major label bands in this video no live stage footage or footage of the band playing is used, the entire video is dedicated to the narrative making it appear as a short film. This is very different to the style that the band usually goes for as their other music videos like "Resistance" and "Time Is Running Out" do conform to the usual rock band genre conventions by using stage footage and the band playing the the video footage. Absolution was the name of the album that this song and others were sold on so it is possible the music video was made differently to stand out amongst other bands and their own work which would draw audiences more to the album because the video was different and new for a rock band genre. Also by using motifs (advanced tech city/space ships) found in popular sci-fi genres this would also attract a larger audience who would be fans of these products.

Lip syncing is used to  link the lyrics with the visuals as the main singer, who is focused on more than the rest of the band, is seen singing throughout the video. Whenever he says the chorus "Sing for absolution" a grand event happens at the same time with the rise of the music making it feel like the music has to get louder in order for us to hear over the visuals for example first he sings it over the launching of the ship, then next over the ship jumping to light speed and finally during the ships entering a planets atmosphere. At this point the lyrics "falling from your grace" also match the visuals of the ship falling to the planet below. The visuals alone tells the story of a sci-fi survival genre, the three astronauts must leave earth on a mission to save some people, already in stasis in space, from the ice age that has hit Earth. However they lose the stasis ship during the collision with asteroids and end up stranded on an alien planet. The ending scene however implies that a distress alarm has been activated on the stasis ship and so there is hope they will be rescued. The music paired with this story seems intended to create a juxtaposition as the music is very slow and calm while the visuals are action packed and exciting. This is done to portray meaning to the audience while telling a story that audiences are familiar with and enjoy seeing.

The establishing shots of the music video are designed to cut during each main beat of the music for example on the beat an extreme long shot of the city is shown, on another beat a low angle of the ship preparing to launch is shown and then the next beat is followed by a cut into the cockpit of the ship. When the music picks up and becomes loud for the chorus this is followed by the ships launch as well as the jump to lightspeed and also plays loud during the crash. This has been done to make the events on screen seem grand and important as well as giving the illusion that the event itself is loud (like you would expect in films) even though you can't hear it (or it is very quiet) in the video. The instrumental also begins exactly as the ship comes out of lightspeed into the asteroid field and plays during the ships attempts to dodge the asteroids, this makes the scene appear intense and is placed in the same way that music in sci-fi action scenes would be placed. Ss the music becomes quiet and slow at the end the visuals are also less hectic symbolising the end of the action.

Unlike both previous videos there are no female characters in the video, the only woman being the brief clip of the notice board in space however this board only shows her face so there is no voyeurism in the video. However like the other clips it also uses the notion of looking, however it is neither through telescopes or mirrors, instead it is through the screens on the ship which is shown multiple times in order to show the collision warnings, the power for the preparation for launch and the inside of the stasis ship.  

There are debatably many intertextual references made in this video since it is a play on the sci-fi genre, the music video made in 2004 uses a futuristic city that looks very similar to Coruscant from The Phantom Menace released in 1999 as well as the space ships which also seems designed similarly to this film. Also the astronaut suits appear similar to the suits in the Alien movies because of this it makes the video look like an homage to sci-fi films, the narrative of the video also fits with this idea.


"Men In Black" - Will Smith
http://www.youtube.com/watch?v=rRuHk6Drj2U
This music video plays heavily on marketing as co-branding is used by making Will Smith the main character of the film also perform in a music video for the purpose of being sold to the audience. Because of Will Smith popularity he is shown in many close ups throughout the video, this conforms to one of Andrew Godwin's theories and is done for marketing purposes. This is a form of synergy as Will Smith is collaborating with the music director Robert Caruso and Columbia Pictures for with the intent of promoting these related products. This is done on purpose as it will make more money for the producers who will be able to sell the music and film while also further promoting the film since the music will be sent out to different music charts, channels and albums. The film also simultaneously promotes the music video as it is can be found at the end of the film and therefore can be sold on VHS (at the time of release) DVD, TV and internet.

The lyrics match with the purpose of promotion for the film as they pretty much just describes the Men In Black organisation that the film is based around with the some of the visuals showing clips from the film and then towards the end the remaining time being taken up with a dance number. Again this is to promote the film as those that have brought the album or have seen the music video on the internet or a music channel may become interested in the film it is based on while also not having the film spoiled as the music video doesn't contain any specifics on the plot of the film.

The video also plays to a lot of Andrew Goodwin's theory as the genre of the music is hip-hop it has a dance number to go with it which includes an alien so that it still links with the sci-fi genre of the movie it is based of. There is also links between the visuals and lyrics as when Will says "Here comes the MIB's" Will is shown coming in a car with agents in a car. And later on Will says "Means what you think you saw you did not see" when he says this he shows a card which then disappears. The lyrics are used in parts to link with the visuals of the film that are shown in parts such as when Will says "extraterrestrial violence" a clip from the film is shown of a car being destroyed by a falling fire ball. This is used many times throughout the film to attract the audiences attention to the film and give them information without spoilers.  

The song also features intertextuality as a lyric from "Forget Me Nots" has been referenced and rewritten from "I want you to remember" to "They won't let you remember" in reference to the neutralizers memory erasing capabilities and Patrice Rushen the artist of "Forget Me Nots."

Thursday, 26 September 2013

Production Equipment

The first camera designed was made by Louis Le Prince in 1888 which can be seen in Bradford National Media Museum. A motion picture camera is a device that takes pictures at a high speed sequence which when played gives the illusion of movement. Early movies had a frame rate of of 14-20 frames per second (FPS) which is lower than today's standard TV frames of 25 FPS and Cinema of 24 FPS.
Kodak in 1923 launched 16mm film stock for cameras which were at a lower cost than the alternative 35mm. In the 1930's experimentations were made with the digital camera by the BBC using cathode ray tubes, it would be many years before they started broadcasting though.

Colour cameras were introduced in the 50's and 60's. The 20th Century relied on VHS and Betamax to keep recordings. In the early 2000's the MiniDV was introduced, it was a mini VHS that could be placed in a camera. However since it was a tape it meant the tape would have to be rewinded for 40mins before playback on the computer. These were soon replaced by the DVD/SD/Hard Drive/Compact Flash Card/Solid State etc.
The MiniDV allowed for 720x576 recording in PAL (0.4 megapixels) which is standard definition. Current consumer cameras allow for high definition which is 1920x1080 (2 mega pixels).
Current film camera (35mm) can range from 10-24 mega pixels or even higher. Current digital standard is 4K which is 12 mega pixels. In a few years time it is likely that HD at only 2 megapixels will be replaced by 4K at 12 megapixels.

Cameras work by isolating the blank film inside from all light so when the shutters open light travels inside through the lens exposing the film and sensor. The image is imprinted on the film so when the shutter closes the film is moved so the next blank film moves into place. This happens at a very rapid rate in video cameras so that the illusion of movement can be given.

The sensor size of the camera has a big impact on the look and quality of the image. The larger the sensor the better the quality of image, it also means the camera can handle the dark better. The smaller the sensor is the higher the frame rate capability and zoom since the small images are magnified however the the image will be grainy in the dark and not have as good quality.
The shutter speed is how quickly the image is captured, the quicker this happens the smoother the movement will seem. Aperture controls how much light is let into
the film, a hole allows light through, the larger the whole the more light is allowed through, the smaller the hole the less light is allowed through. ISO controls how sensitive the camera is to the light, this is measured in numbers (100, 200 etc.) the lower the number the lower the sensitivity and the of the film and the finer the grain in the shot.

Lighting is used to create depth and bring the subject forward from the foreground and look more 3D. This is done by using Fill Lighting/Key Lighting/Backlight etc.
The Key Light is placed at a 45 degree angle from the camera. The Fill Light is used to fill in distracting and harsh shadows that the Key Light creates. The Backlight is used to add dimension and create a more 3D look, however the Fill light and Backlight shouldn't overpower the Key Light otherwise a very unnatural look may be created.
In situations where lights can't be used reflectors are very useful as the reflect natural light in the direction needed. White reflectors are used to bounce light light, silver reflectors are used to bounce a lot more light while gold reflectors bounce light while giving a warmer tone to the light.
There are also different microphones for different situations for example the Shotgun microphone which is used for filming outdoors, a Dead Cat can be used to cover the mike so that wind sound is reduced. Dynamic microphones are used by on stage performers like singers and live comedians. The Condense microphone is used in music studios by singers recording their voice or radio stations.
Good quality sound should be recorded by ensuring the microphone is facing the actor while sound levels are peaking however they should not be hitting maximum otherwise the sound will come out sounding distorted which can't be edited out.