
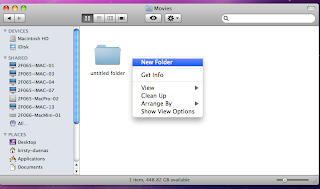
To do this you can simply right clicking on the desktop and clicking "New Folder," this will make an empty folder that is easy to find however this means that anyone logged in can also get into it.

You can find an area in the computer and create a new folder if you feel it would be more secure. Click "Finder" on the bottom left (picture of a blue face) and choose one of the folders you want your work folder to be in, then right click and select "New Folder." Or you can save a folder on a memory stick using the same method of right clicking just in the memory stick.

You must then ensure that all the files you want to use for you production are in this new folder you have created. Do this by finding any files you may have downloaded from Youtube or anywhere else and dragging them into the new folder you have created.
If you have filmed footage on a camera, connect the camera to the computer use "Spotlight" at the top right to search Final Cut Pro. You must then create a Scratch Disk so that any files you capture will be stored in this file including rendered files, waveform, cache and autosaves.

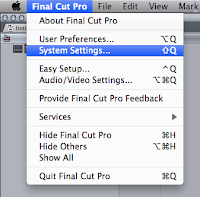 To do this open Final Cut Pro go into the "Final Cut Pro" tab and select "System Preferences," next to the line of ticks click "Set" and use the drag down menu to find the location of the folder that you previously made for all of your work. This is now your Scratch Disk were all the files you put into Final Cut will be stored.
 To get the footage from your camera onto Final Cut Pro go into "File" and then "Log And Transfer" to copy all of you footage from camera in Final Cut Pro. If you have made your Scratch Disk all of your footage will be saved into your folder with all of your work.
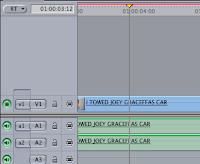 In Final Cut Pro you can create a Sequence this is the order that you put your footage on the timeline to do this drag the footage either from your folder or if you have logged and transferred footage from a camera it should already be in Final Cut Pro and you can then drag it into the timeline. A red line may appear on top of the timeline, this means it needs to be rendered. To do this go to "Sequence" and then "Render All" and then it will take a few seconds for the video to render and it should now play.
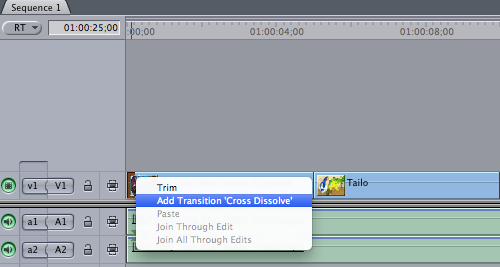 To add crossfades to you clips simply go to the beginning or end of the clip. Right click and select "Add Transition 'Cross Dissolve'.
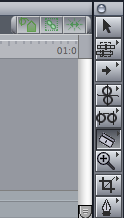 If you want cut a clip move the mouse to the side bar on the far right of the timeline. There will be a razor blade icon. Select this icon and the mouse will change to have a cross next to it. It will change into the blade when you scroll over the video track.
 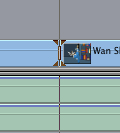 Then simply click on the section you want to cut and it will be split so you can move the two sections apart.
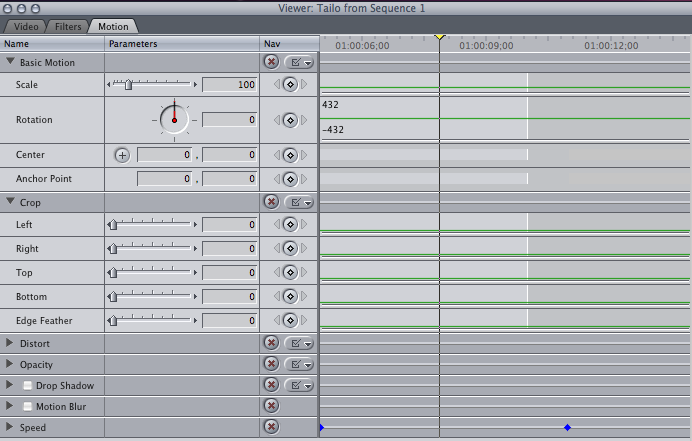 If you want to crop the image shown in the video, go to the first window that shows the video. On top of the screen it will say "Video/Filters/Motion. Click on motion and scroll down until you find "Crop." When you click on crop, multiple buttons will appear that you can click and drag.

By dragging them parts of the image on screen will be cropped. you must make sure you double click on the part of the video on the timeline that you want to crop.

You can also have multiple Sequences on one project, doing this allows you to create a rush which is were your sequences can be reviewed quickly because they are in the same project meaning you can receive feedback for all of them quickly. To do this right click in the big box that has "Sequence One" in it and click "New Sequence" this will create "Sequence Two."
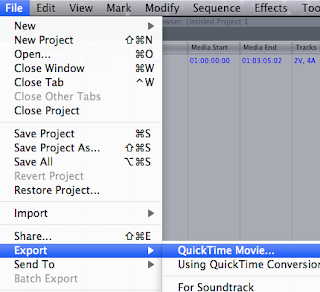 Videos can be exported in different files, this is because different files have different purposes. For example for the video to be the highest quality you may want it to be an MOV format and uncompressed. in Final Cut Pro you can use Quick Time Movie a high quality compressed version of your current sequence in a MOV file which is an Apple format. Or you can use Quick Time Conversion which means that the video can be converted to a wider choice of formats. To do this go to "File" then "Export" and select "Quick Time Movie." Name your sequence and save it to your folder, wait for it to finish exporting.
Or select "Quick Time Conversion" and click the drop down option that is on "Quick Time" by default. Choose the option best sooted to your need from the drop down list. This may be because the video you want needs to be in a format for mobiles specifically, or the internet or DVD's.

No comments:
Post a Comment