It will now be in Final Cut Pro were you can drag it into the time line to edit.
The easiest way to add a cross fade is after the clip has been dragged into the timeline you can right click on the end that you want the fade to occur and then click Add Transition "Cross Dissolve."
In order to cut the clip you must press the Razor Blade tool on the window on the right hand lower corner. Then click on the parts of the clip that you want to cut.
In order to crop a clip move the curser to the end that you want to crop, click and hold on the end and then pull it down to the part that you want, this will delete the parts of the clip you don't want but you can also return them by dragging the end of the clip back.
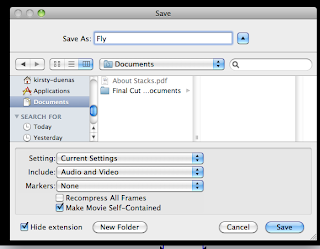
When you are finished editing the footage go to File - Export - QuickTime Movie.
 This box will appear, name your project and then press the arrow next to the Save As box. This will open up Documents so you can find a place to save your finished project. You can change settings to change the quality of the video or if you plan on uploading the video elsewhere you can change the settings to make the video compatible with other sites. Then press Save and wait for the video to finish Exporting.


No comments:
Post a Comment